Boat Motor Winterization Newsletter
Welcome to the inaugural edition of our Monthly Technical Tips Newsletter. In conjunction with our goal aimed at serving the retail customer, the purpose of this newsletter is to further assist customers in understanding the basics of the marine products they purchase and own. Future editions of this technical newsletter will feature several other common areas such as product identification, engine fogging, performance enhancements, full versus 1/2 cooling systems, and exhaust manifold replacement. Your feedback is greatly appreciated and helps us to continue providing you with helpful information. Please feel free to respond back to us and let us know if this type of information is valuable to you, as well as suggesting future topics you would like to see included [email protected]. We will also use this newsletter to offer extended discounts to our “preferred” customers which are identified as those who receive this news-letter. 2You can supply us with the volume/edition code at the lower right hand corner to receive a 5% discount on orders up to $500, and 2% discount on orders above $500.
“MARINE WINTERIZATION“
With the passing of the recent labor day holiday the “slowing down” milestone has been marked for the 2005 boating season. Many of us are faced with the ominous task of preparing our boats to be laid up for the winter. The term Winterize is often associated with draining of the cooling system, however actual winterization is a much broader term and entails much more than simply draining. The terms “Cold Weather”, “Extended Storage”, and “Package Layup” seem to be more common today, and the following information may be of use in helping you determine whether this is a task you can take on yourself. Please keep in mind that each manufacturer has specific requirements that should be adhered to. The information contained herein is not fully inclusive but is intended to be a general guide.
Fill the fuel tank with fresh non-alcohol gasoline. Add a sufficient amount of gasoline stabilizer which is specified for marine engines and then run engine sufficiently to bring it up to normal operating temperature while allowing the treated/stabilized fuel to circulate through fuel system.
Before moving ahead you must have some way of preventing the flow of fuel from the tank to the engine. This is typically done with an inline shut off valve.
Marine Fuel System Extended Storage (EFI):
In a small container mix a small amount of fuel and a couple of ounces of 2 cycle outboard oil. Remove and drain the water separating fuel filter, and fill with this fuel oil mixture. Re-install the water separating fuel filter. Start and run the engine at idle speed until the engine stops from due to fuel starvation from emptying the water/fuel filter. Remove and discard water separating fuel filter. Install a new filter.
Marine Fuel System Extended Storage (Carbureted):
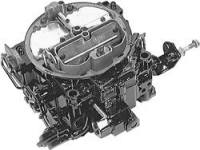
Remove the flame arrestor and restart the engine. Operate the engine at approximately (1000-1500 RPM) while “Fogging” the internal surfaces of induction system and combustion chambers. This can be done by squirting a small amount (about 8 ounces) of SAE 20W engine oil into the carburetor bores. Run the engine while squirting this into the carburetor until you have used about 75% of the oil. At this point rapidly squirt the remaining 25% of the oil into the carburetor to stall the engine. Turn the ignition to the OFF position.
Clean flame arrestor and vent hoses.
Lubrication
Change oil and oil filter.Lubricate all items as listed in the owners manual. Throttle and Shift Cables, Steering, Coupler, U-Joints, Transom, Gimbal, Propeller Shaft, etc.
Flush the cooling system. Refer to each manufacturers specific flushing procedure as indicated in the owners manual. Drain seawater section of cooling system, as specified in the owners manual. This typically includes the exhaust manifolds and exhaust risers, both sides of the engine block, oil/power steering coolers, and circulating pump. Don’t just assume that when you pull a hose or remove a plug that everything will drain. It’s a good idea to take a piece of wire and stick it into the drain hole to make sure no scale or sediment is blocking the hole from allowing full drainage. Be careful with this as manufacturers WILL NOT cover freeze damage.
On models with Closed Cooling Systems follow the manufacturers directions to drain the sea water section of the cooling system as well as testing the coolant to ensure that it will withstand the lowest temperature expected during storage. Most manufacturers utilize the normal maximum glycol content 50/50 mixture which is capable of withstanding freezing down to -30F. In comparison the minimum glycol content is 10% which prevents freezing down to +26F.
Read More Fresh Water Cooling Basics
General Items
Service the batteries as required by the manufacturer of the battery.
Wash/Clean the outside of engine and allow to dry. Repaint any areas where bare metal is exposed, and allow to dry. Completely cover/spray the engine with some type of corrosion inhibitor or wipe down with SAE 20W engine oil.
Inspect U-joint bellows for cracks or weathering.
Check the bellow hose clamps to ensure they are tight.
Check engine alignment.
Change sterndrive unit oil.
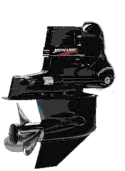
Make sure the Sterndrive is in the DOWN position. This is required not only for draining of the unit but also to ensure that the bellows do not take a set which can lead to pre-mature failure when returned to service.
Use a piece of wire to check that water drain holes in sterndrive unit are open and allowing drainage.
Clean sterndrive exterior surfaces and repaint any bare metal surfaces.
Coat the entire sterndrive with some type of corrosion inhibitor.
For additional technical information select the following link Technical Information Library.


